A while ago I posted this “How to paint marble” on a forum but it was a members only area and thought it may help people.
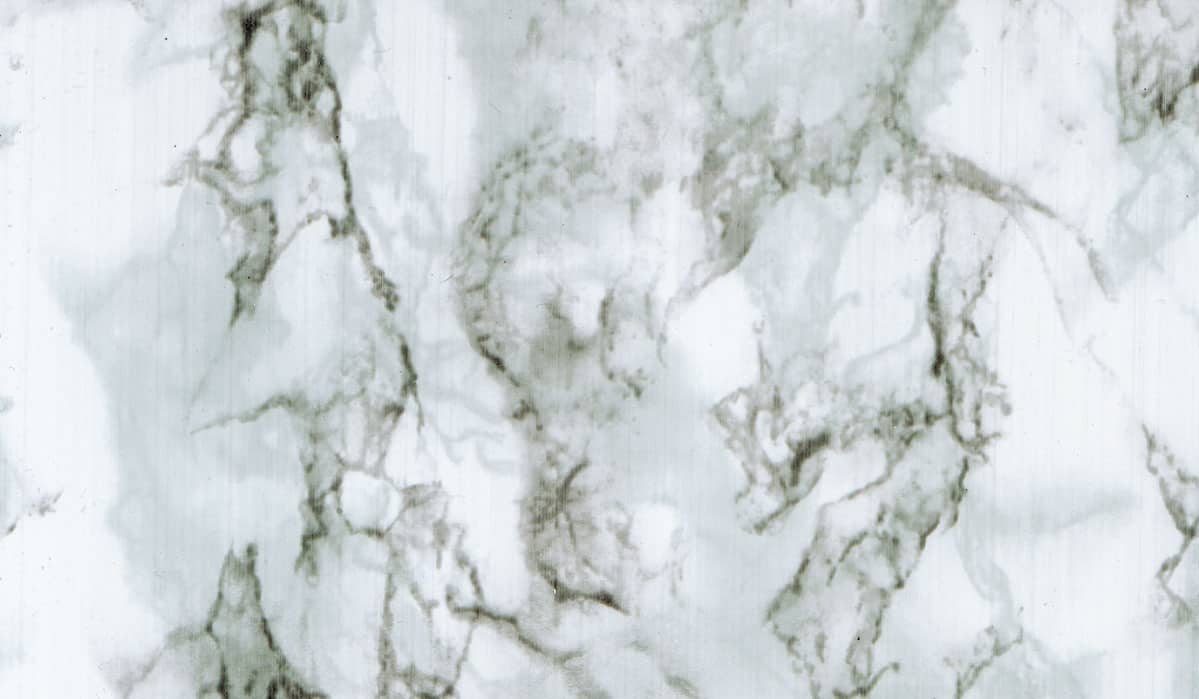
So the first thing to do is find a marble pattern that you like the look of. Do a google images search under marble you should find something out there. Then try to find some colors that go well with your sample, if you just like the veining pattern you can use any colors you like. There are various different ways that the veining runs from huge sections to tiny thin wisp patterns. Just remember if you plan on doing broken sections the contrast in the unpolished section to the broken parts is easier to see with light to dark. For example bright white marble does not show the broken sections as easy since there is very little contrast, a light grey would work better.
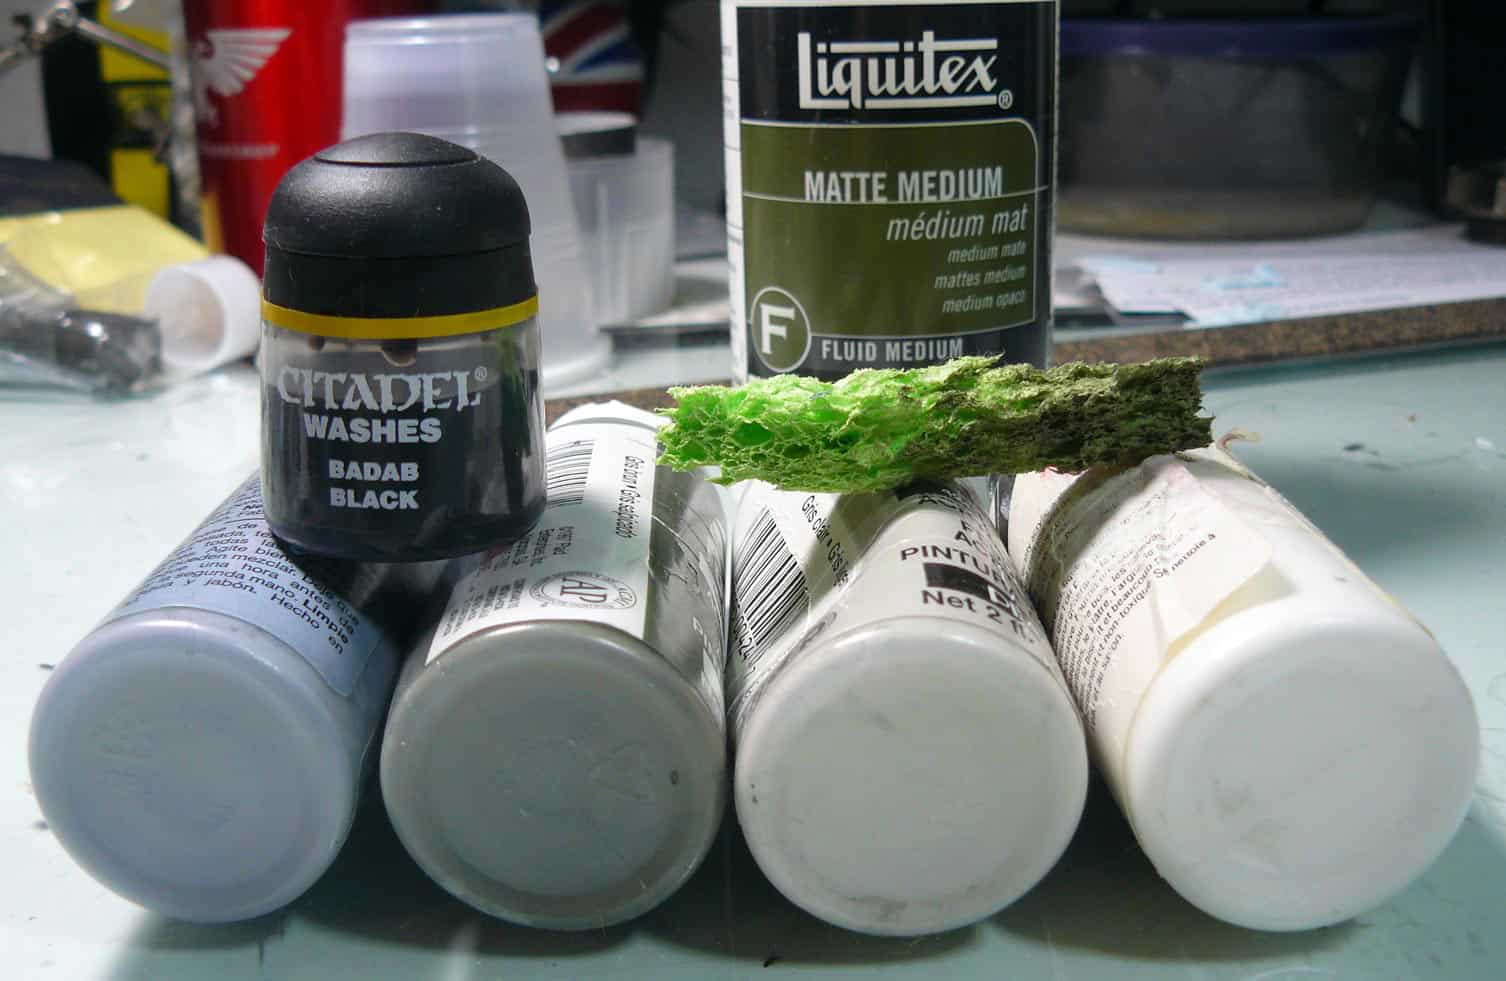
Here are the colors and materials I used for this little project. I use cheap craft paint for terrain mostly so the color names won’t match hobby paints. The wash is for the smaller veining and the matte medium makes the larger areas more translucent when layering. The sponge will keep the big veins random and the feather creates a random pattern with the wash. Oops no feather in the pic.
cheap paint colors from left to right
porcelain blue, dapple gray, light gray, and white
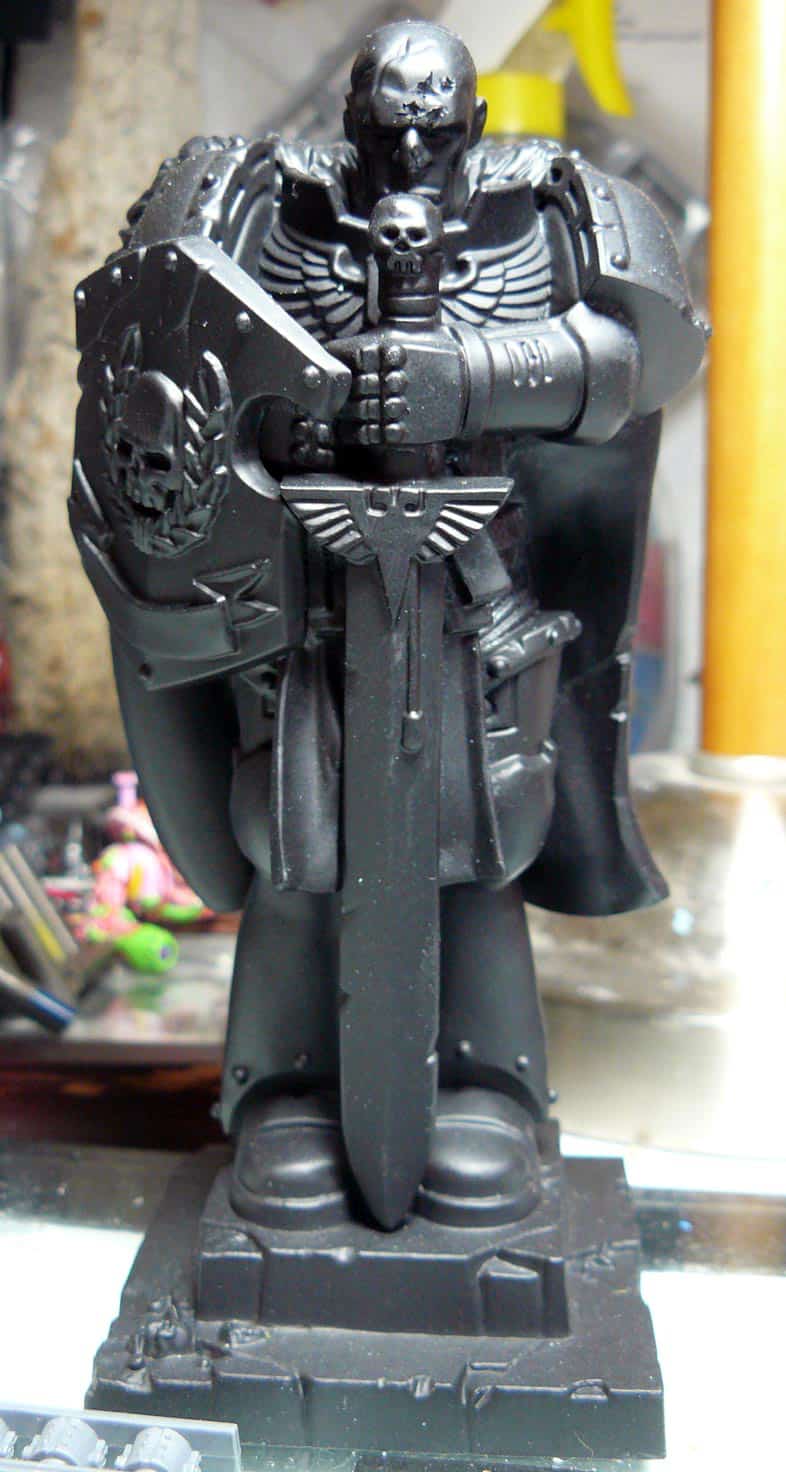
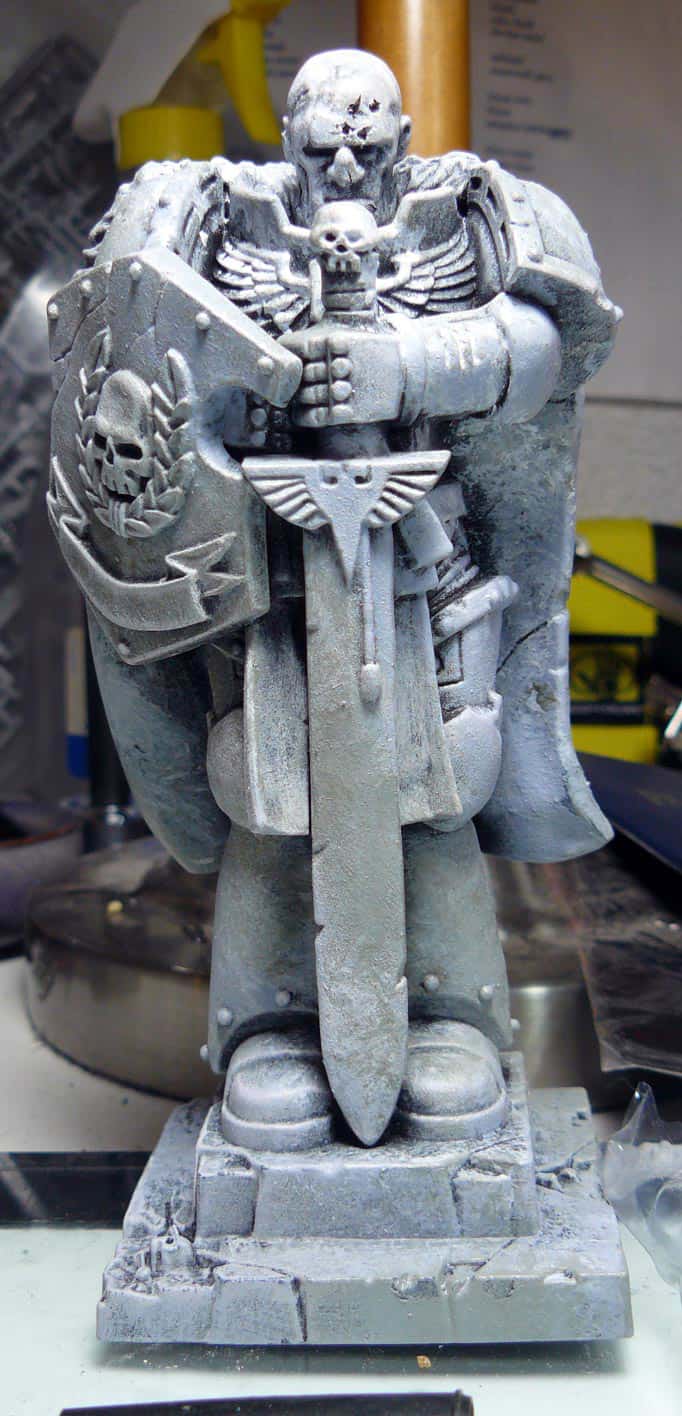
For this design I started with good old 3 dollar matte black primer.
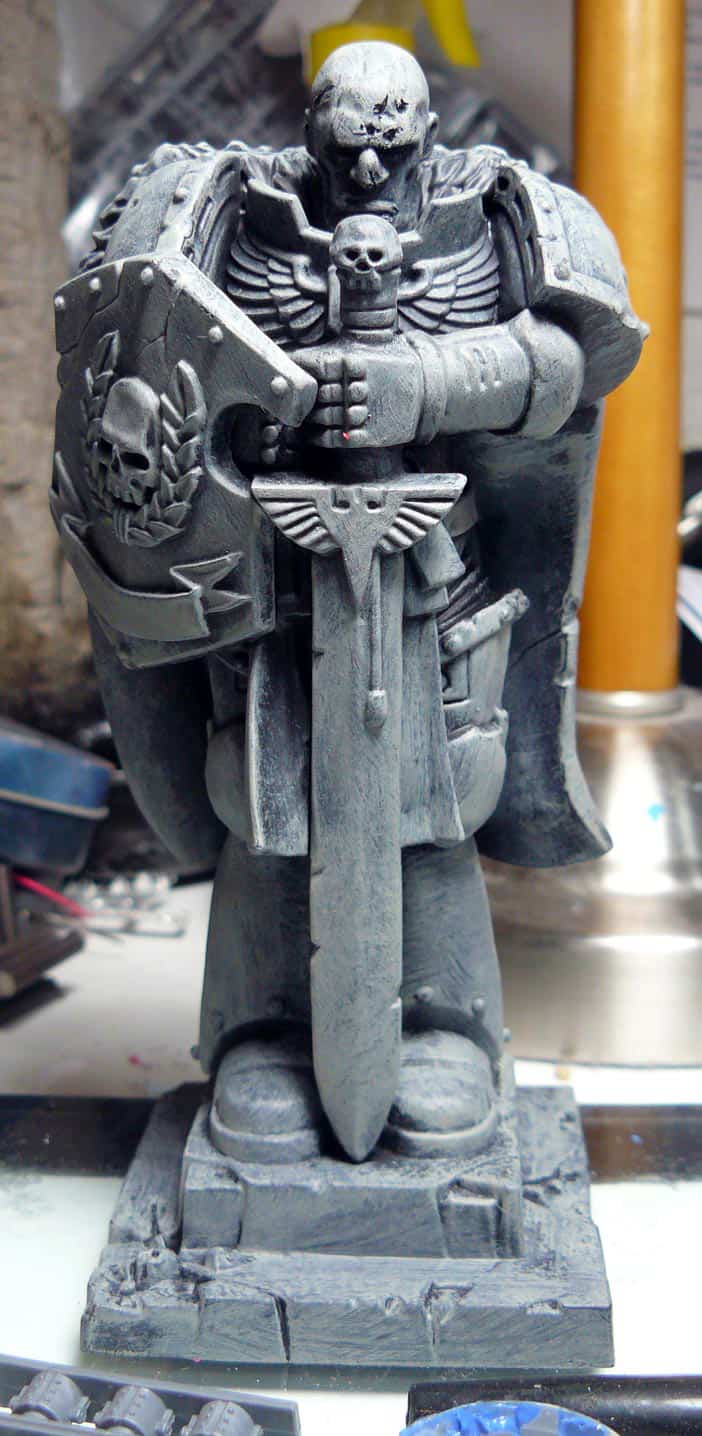
I applied a heavy over brush of the light gray, if there is ugly brush strokes in there try to dab instead of push but don’t big deal it. Extra texture build up is good at this point.
Start to lay out big veins now with 50/50 white/light gray mixed with the matte medium. This begins to create depth in the marbles colors by allowing the paint to remain semi-translucent.

Sponging in a big vein of the dapple gray mixed with MM(matte medium 50/50 paint/medium). As well as a couple big veins of the porcelain blue MM mix.
Then back over with the sponge of light gray MM mix to break it up a bit.
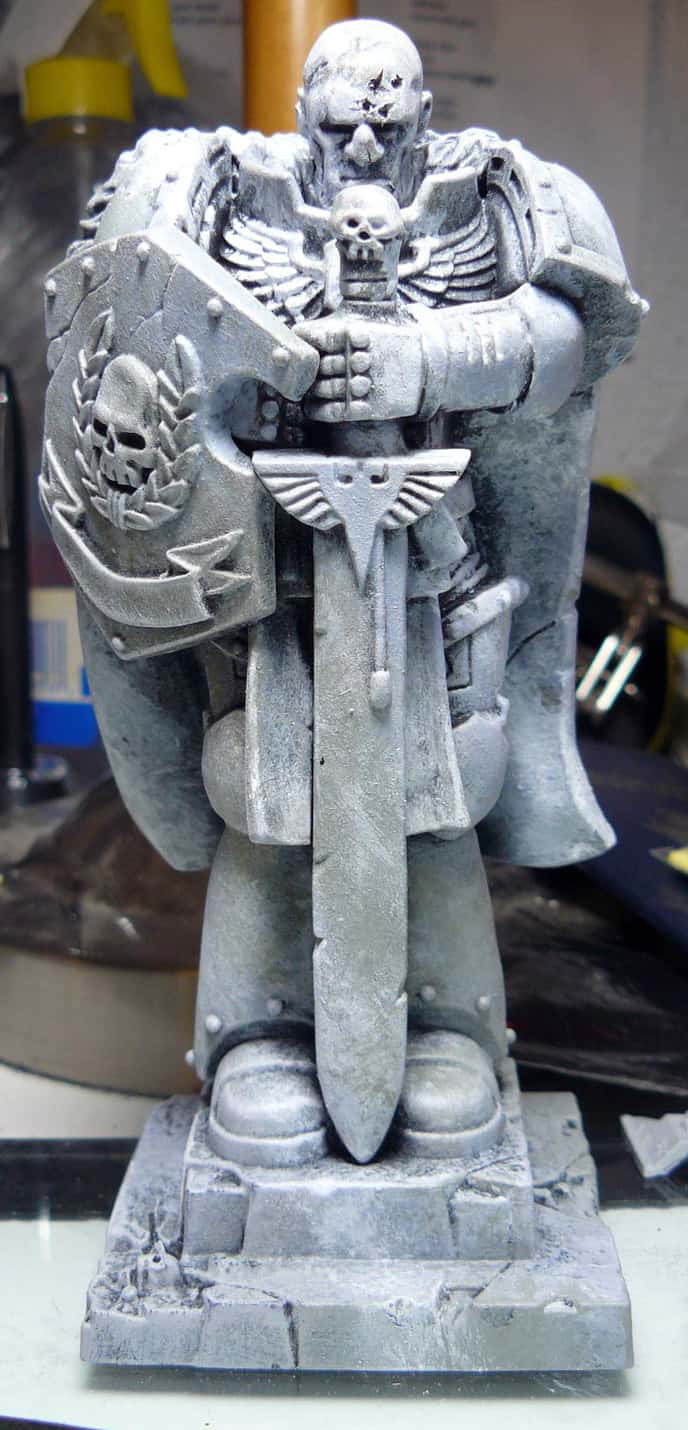
Next I sponged the edges and a few smaller veins with a white/MM mix.

Even though it still looks a little rough its time to start in with the small veins. I like to use a very contrasting color. If you plan on breaking the parts up do this veining first as it will look better to the eye. Either grab a GW wash or mix up your own. I varied the amount of water I used with the wash to change the level of opacity. I find a ripped up feather helps me keep it random or you can use a fine brush with a large reservoir. Here I start at the bottom . . .
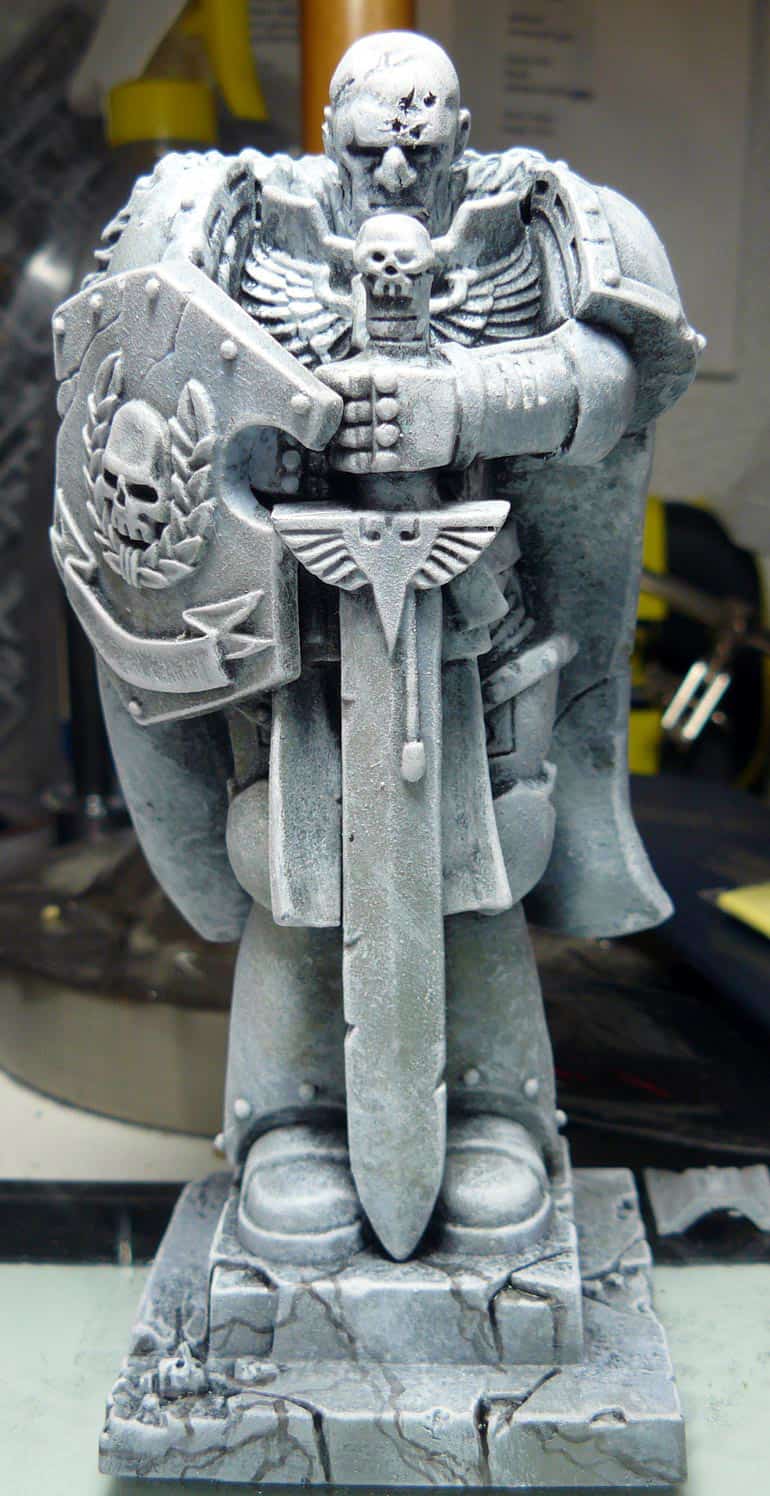
For whatever reason I jumped up top to work down after finishing the pedestal.
Down the sword and one leg.
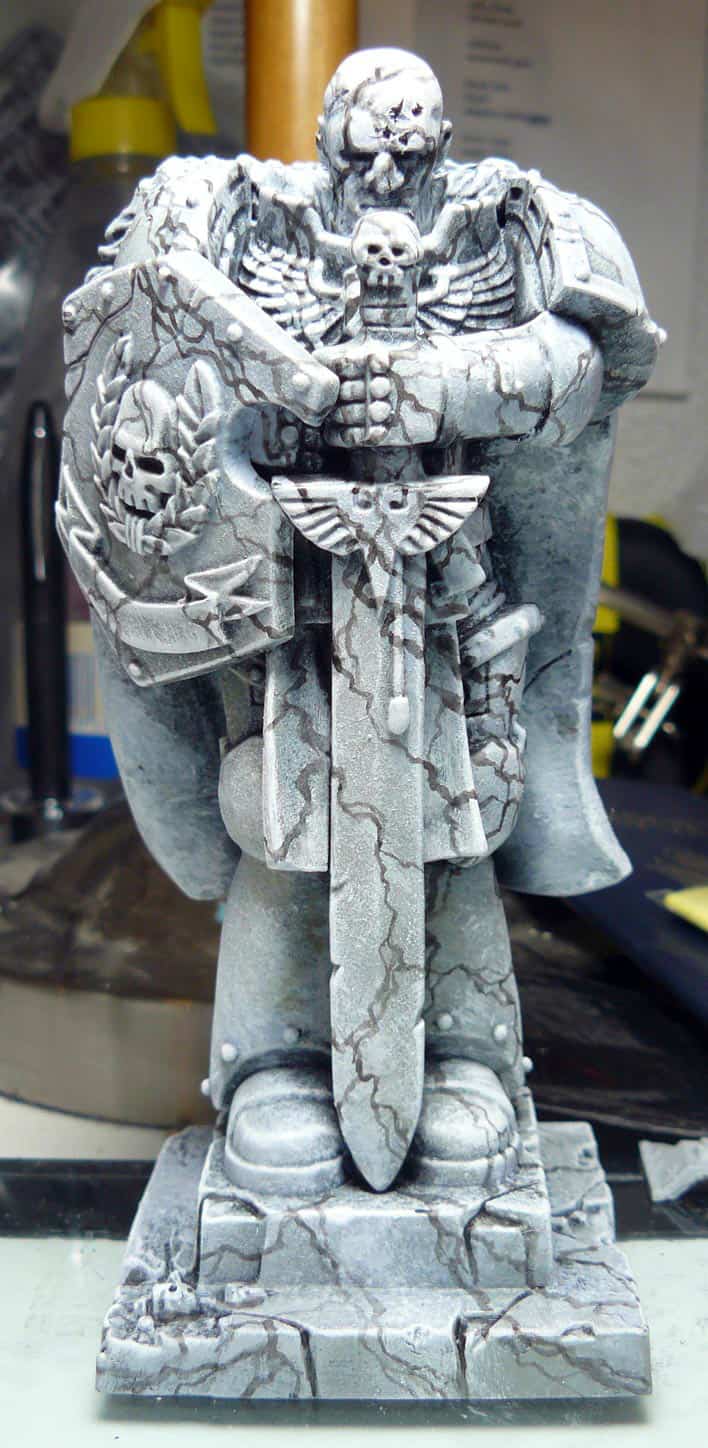
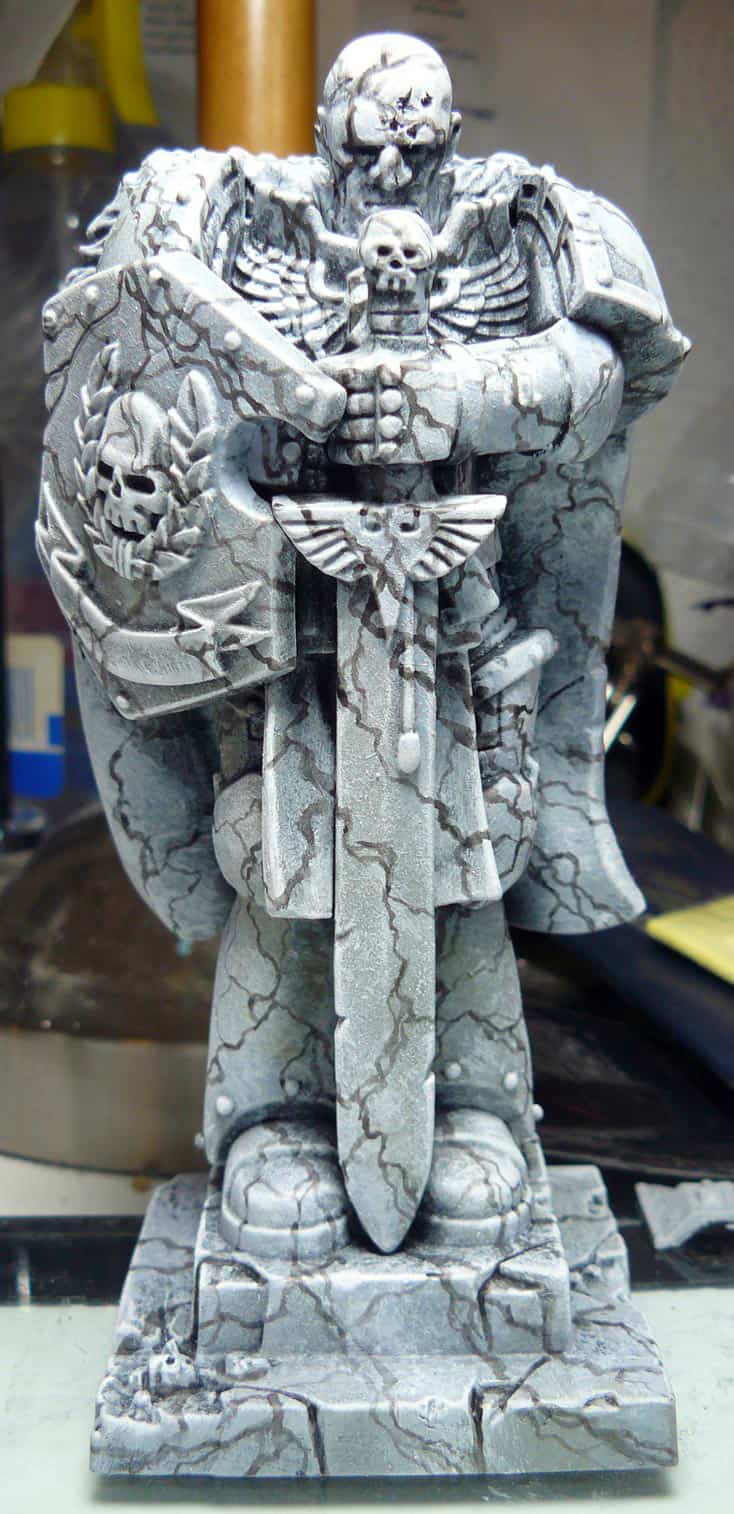
Once finished with the front I went back and added a few lines here and there to make it feel more random. Since I was working off a real pattern I wanted to copy it the best I could.
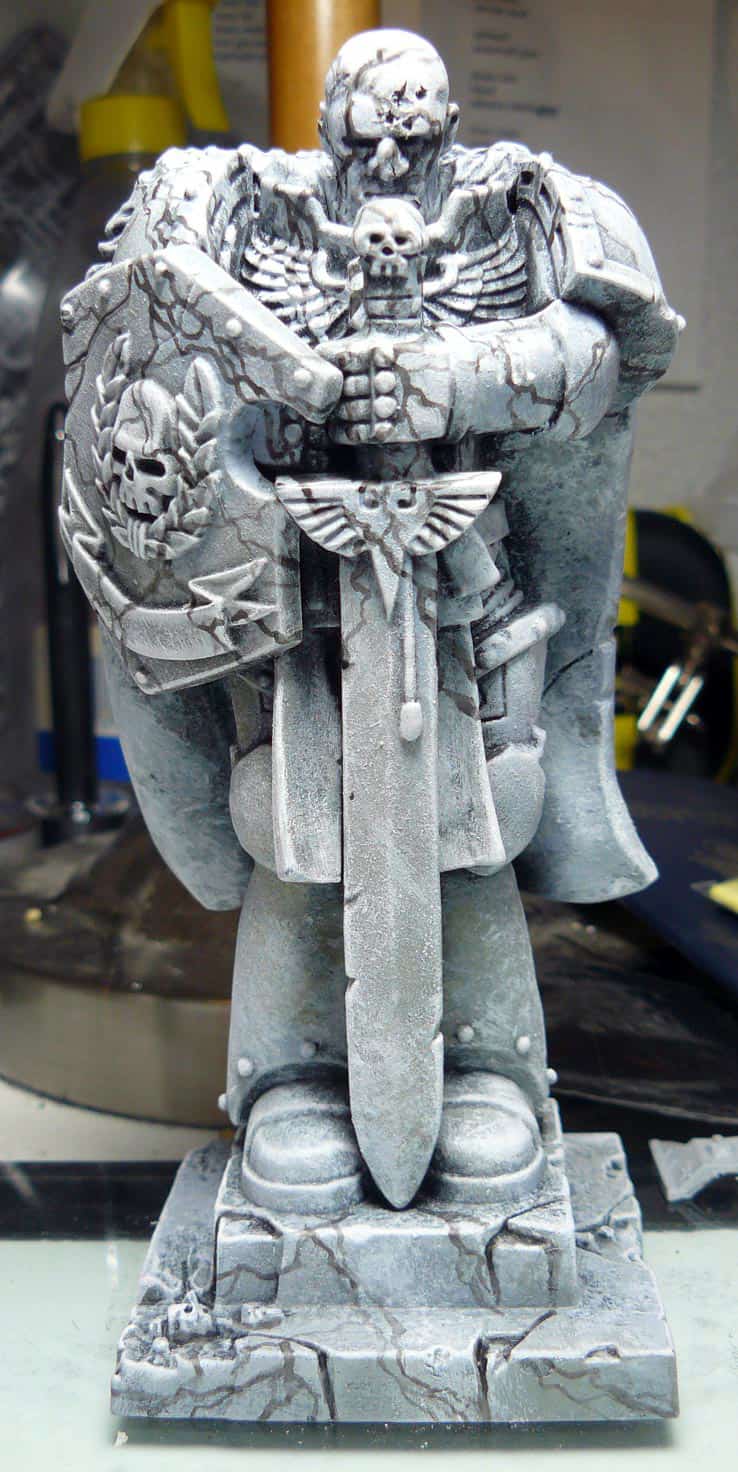
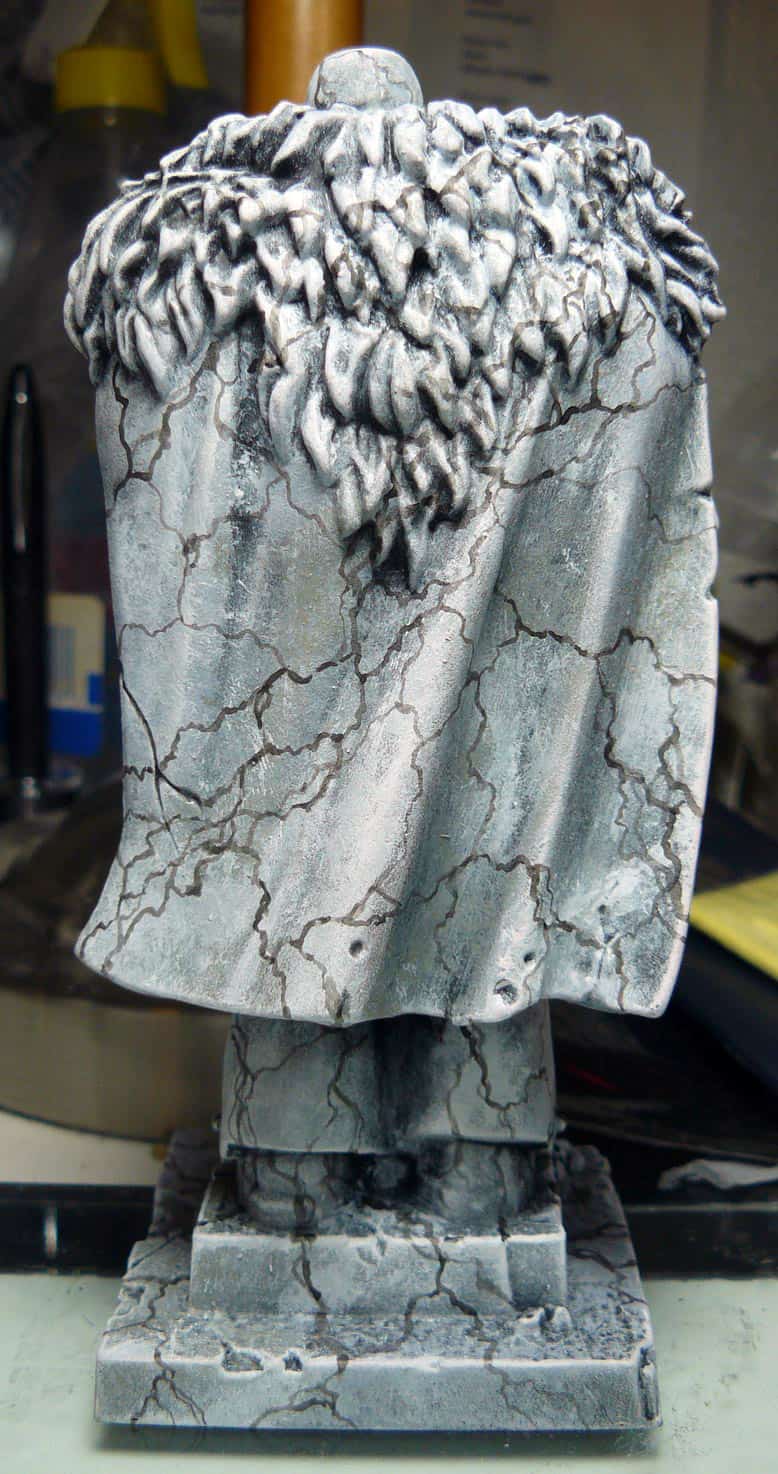
Now onto the back with the same washing process.
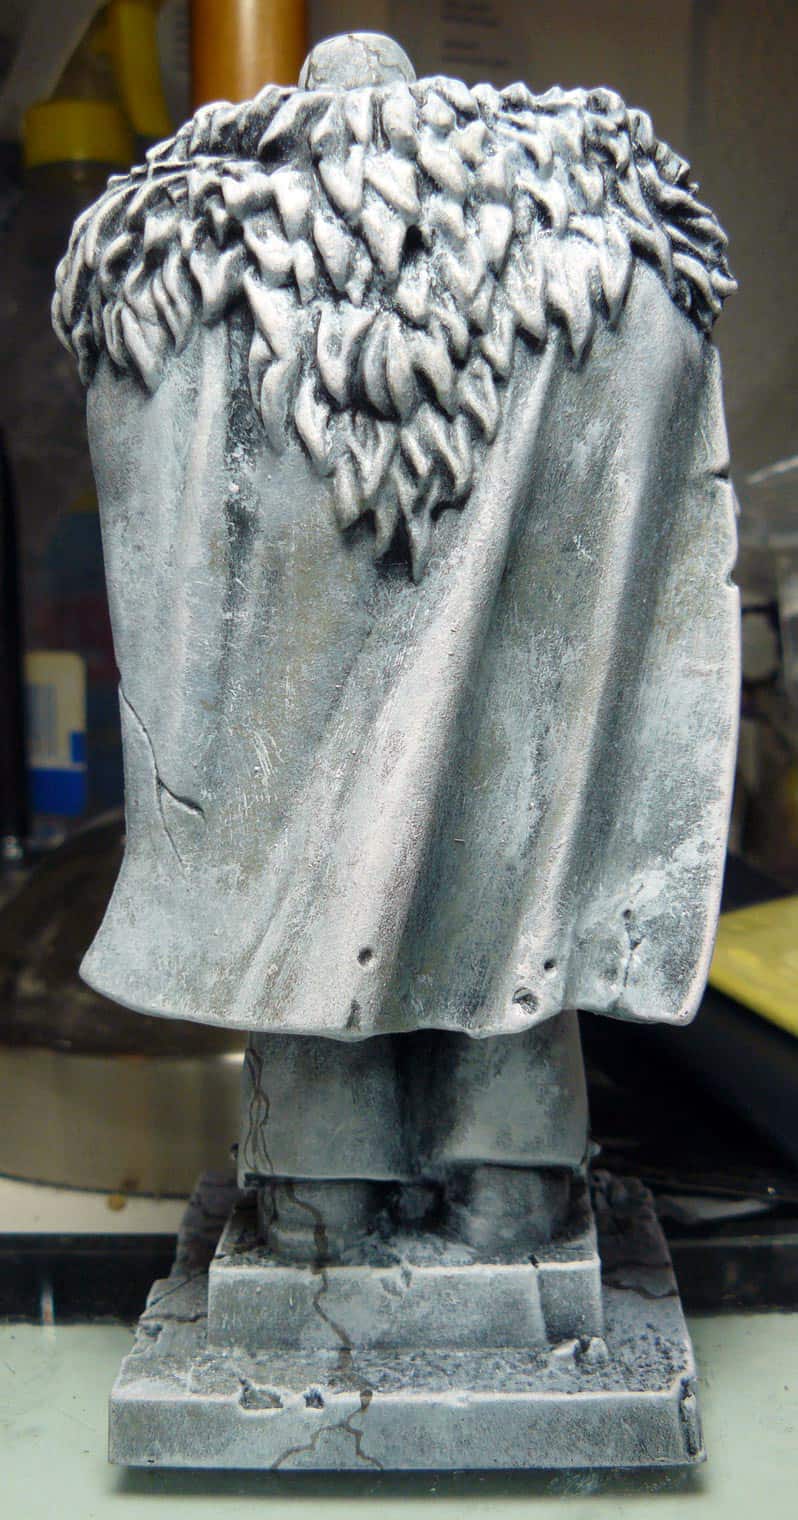
You can see here a little easier the different opacity of the wash as I worked on it. Even just going back over random sections will create a nice effect if you don’t want to water it down.
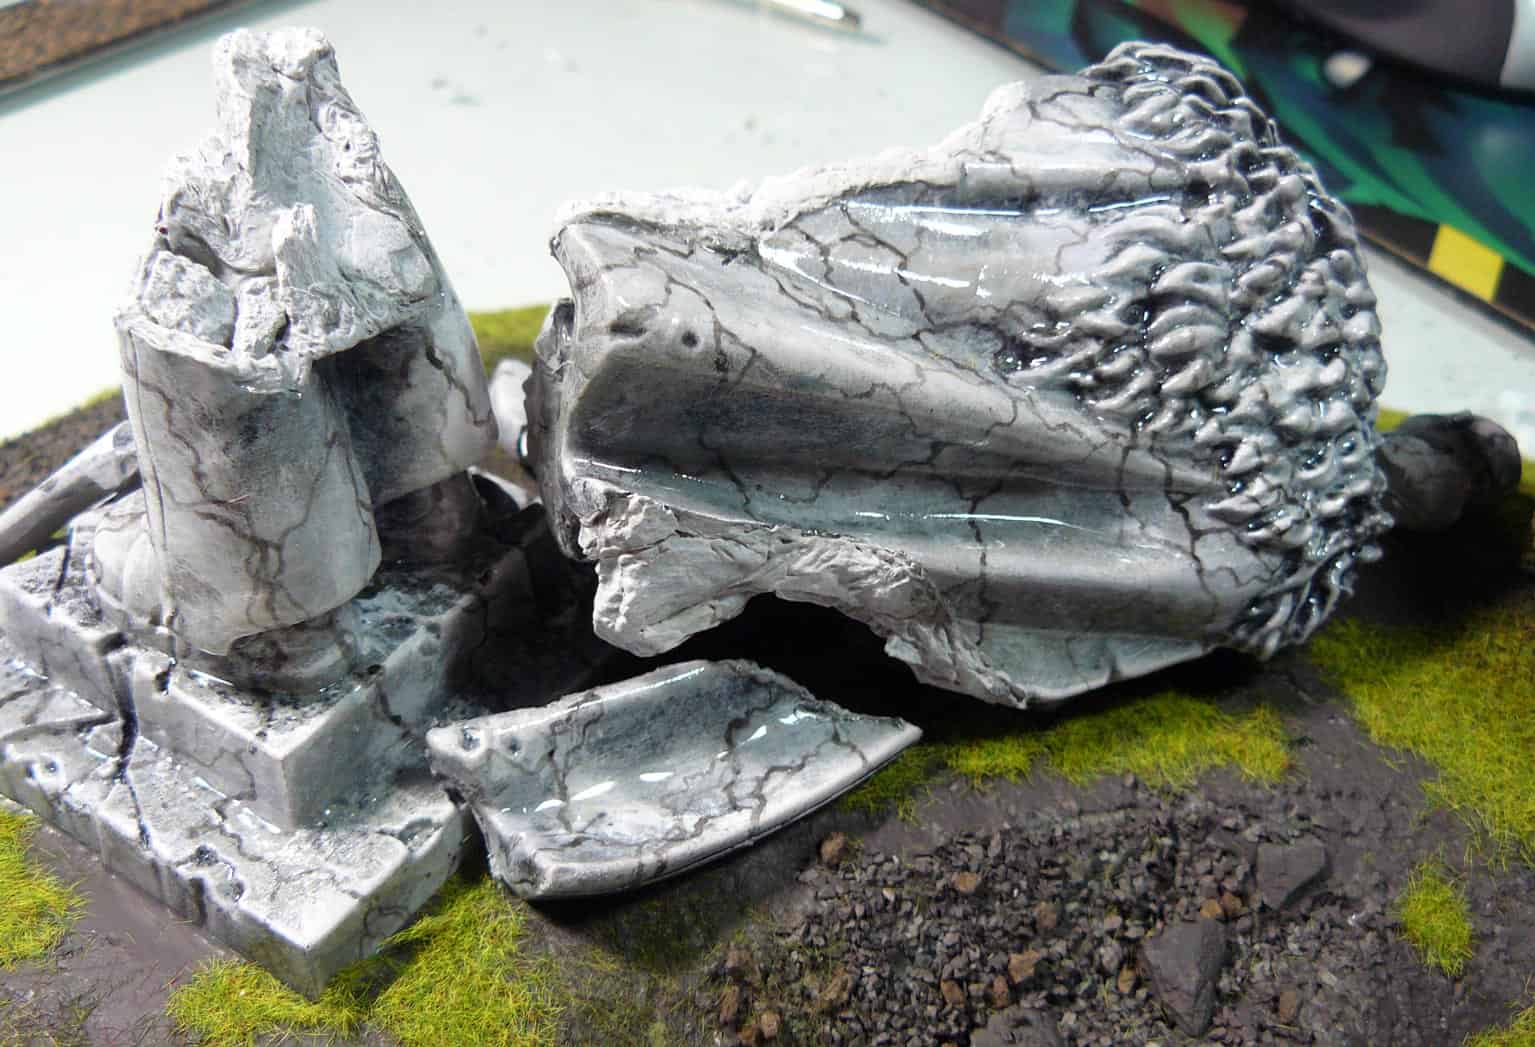
If you don’t want broken marble at this point put on as many coats of gloss coat as you can stand with as few brush strokes as possible, airbrush would be best if you have it. The key is to flatten all the texture and have that polished stone depth. The more layers you add the better it looks. I like to add it in heavy coats because I’m inpatient but the smart way to do it would be 5 or 6 regular coats at least. When you think you have enough layers, go two more.
On this project I’m running the gambit so I will wait to add the polish. I have to glue in small bits of slate and then grey stuff the cracks in all the open holes of the model once I chop it up. here you can see some of the big holes left after attacking it with the dremel cutting wheel.
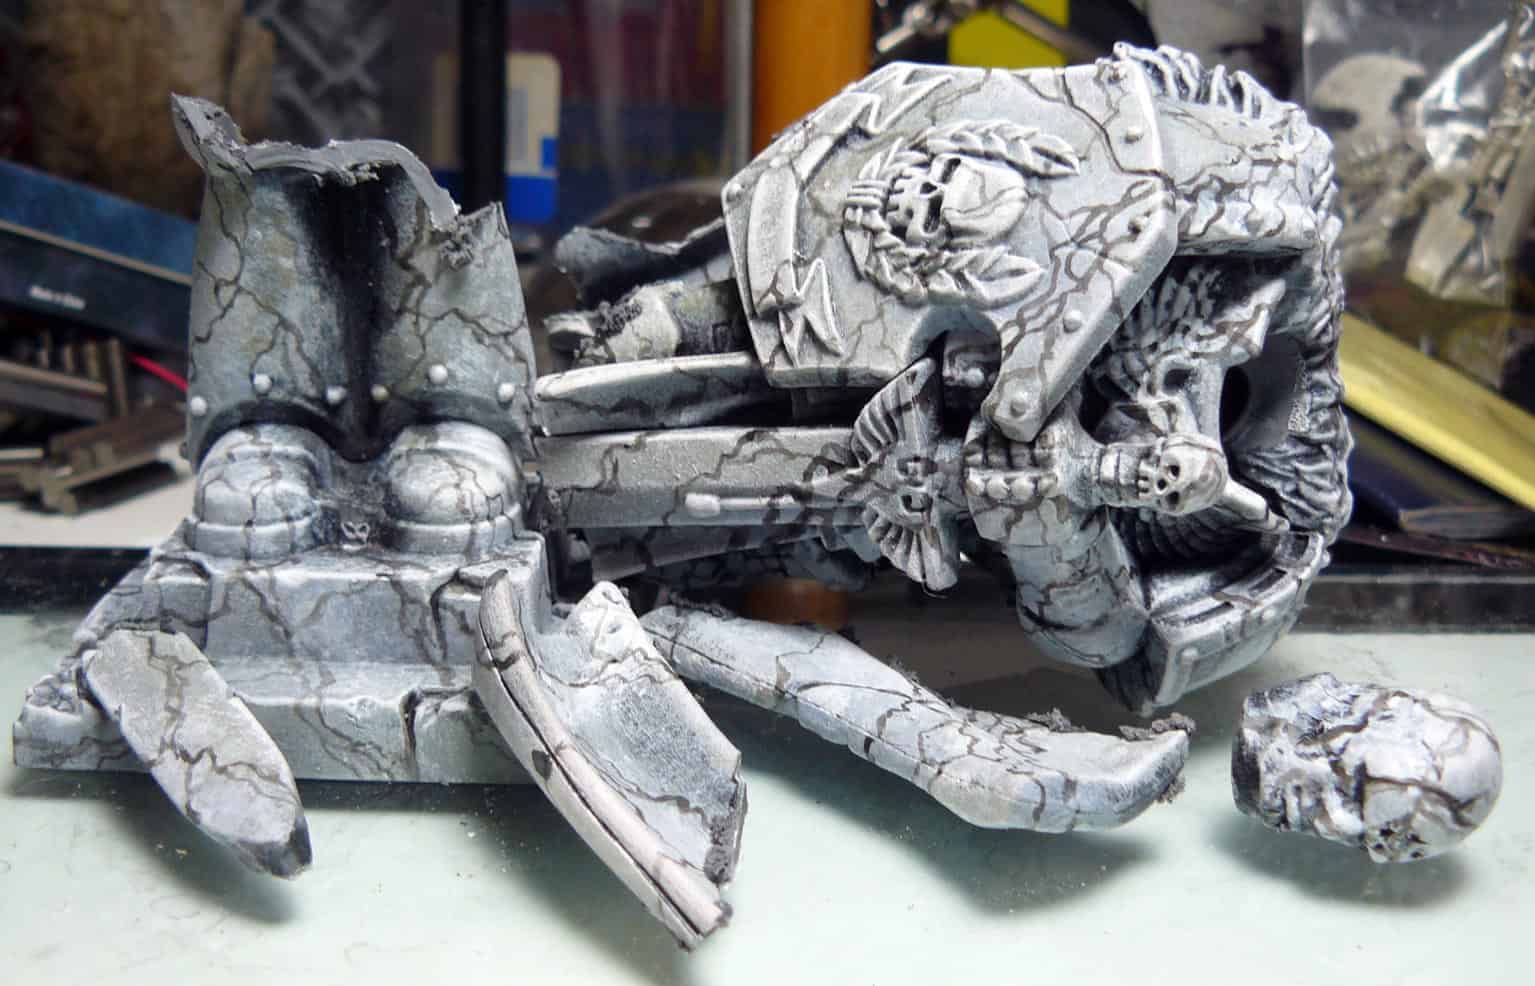
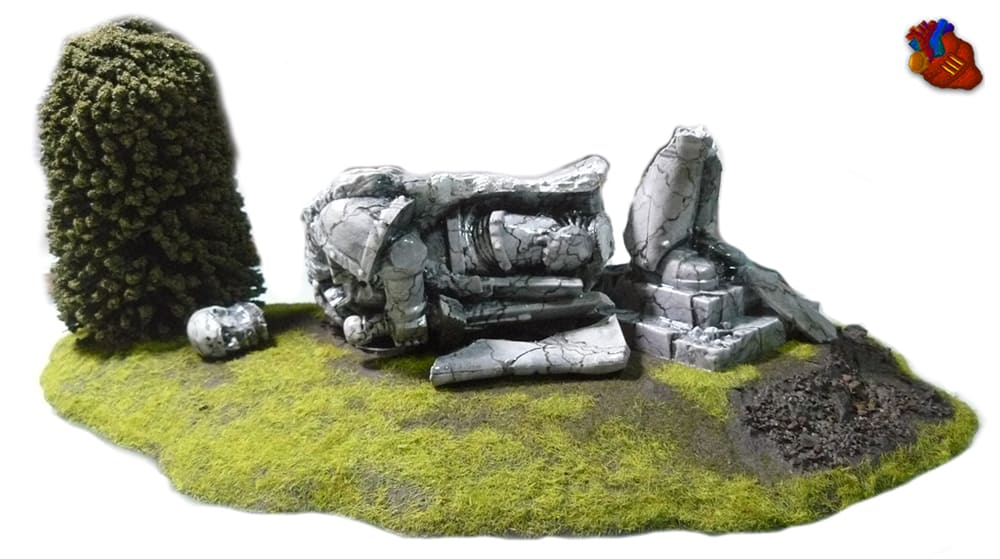
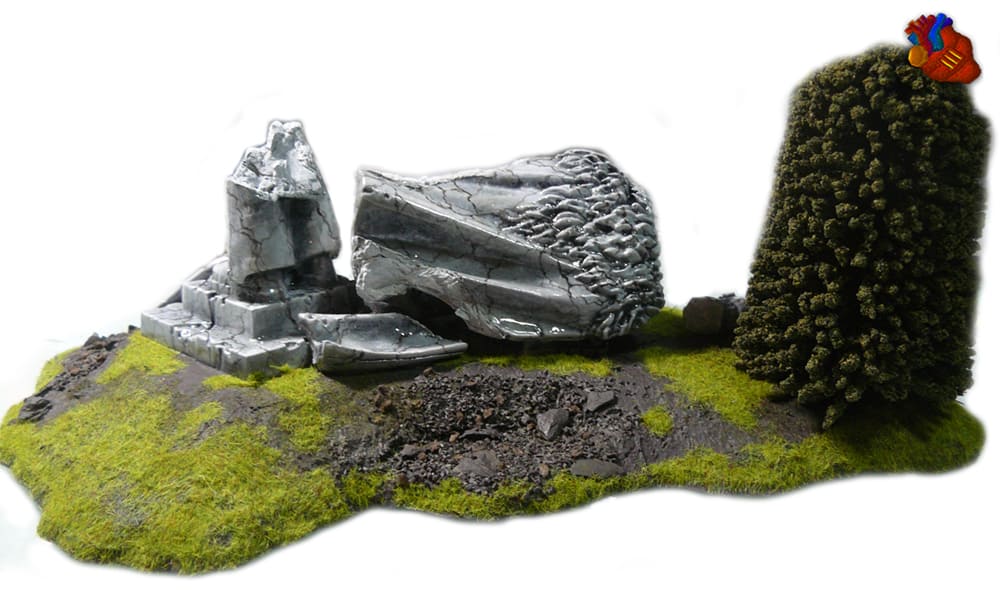
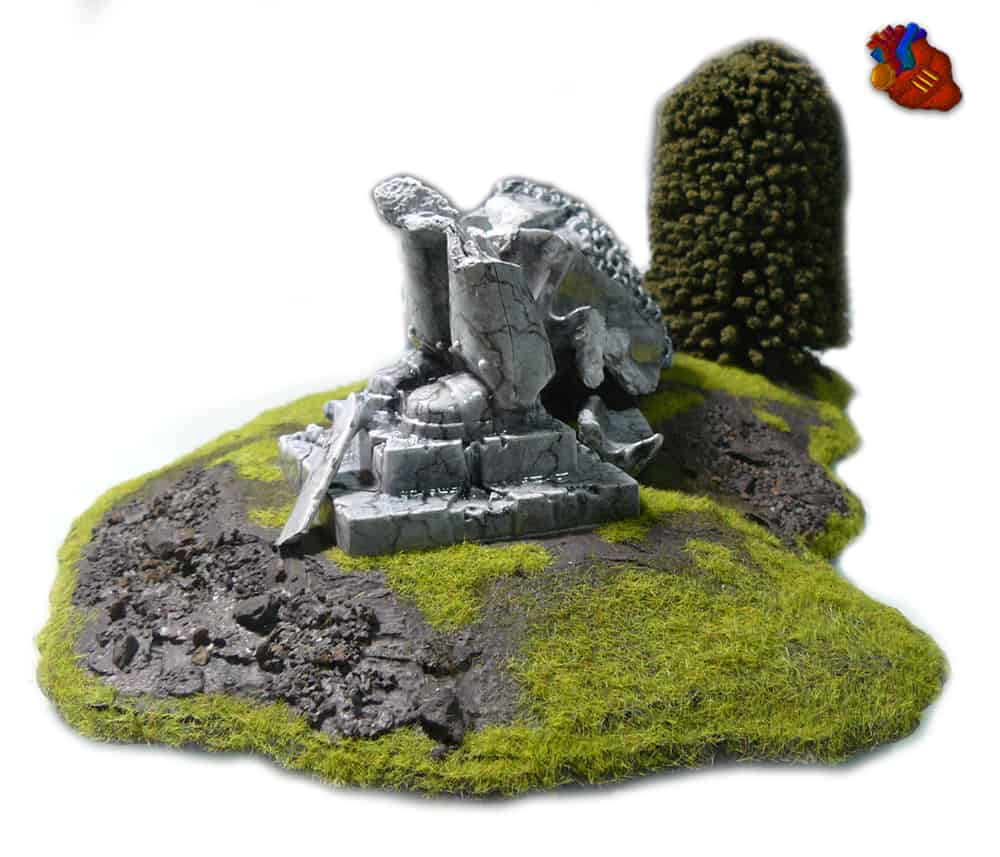
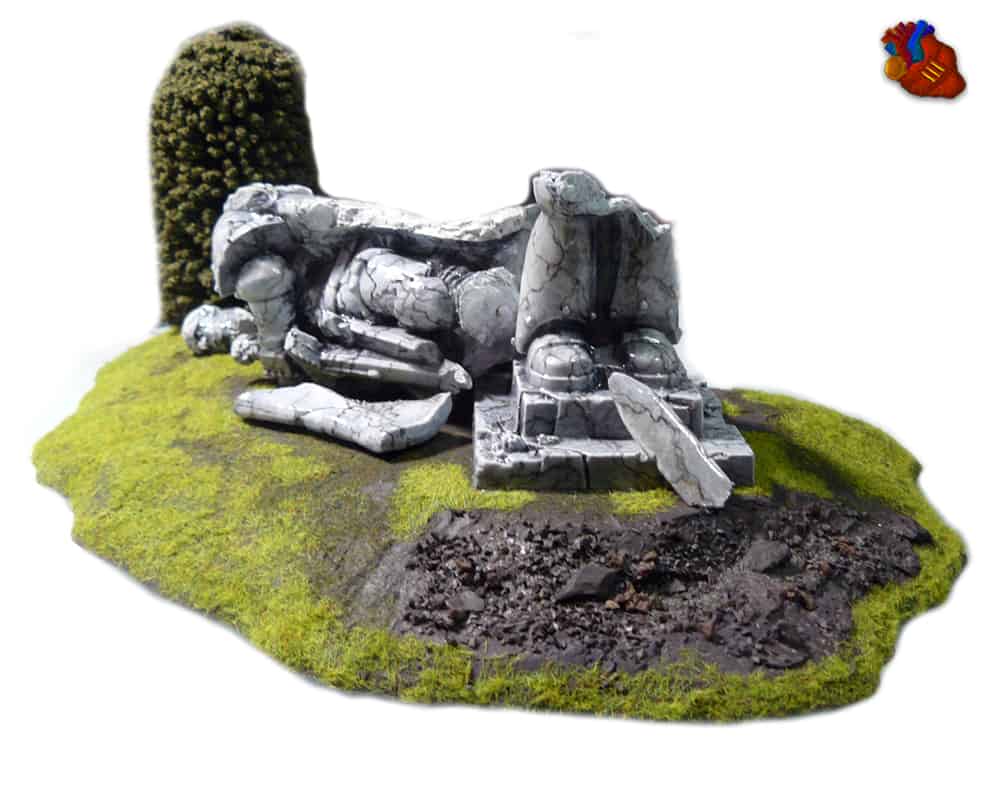
A quick layout of the part to see how they will work best on my hardboard and foam hill. Since this terrain commission was for a stores only full time table it made more sense to have more horizontal line of site blocking terrain rather than the vertical you get with the statue as a whole.
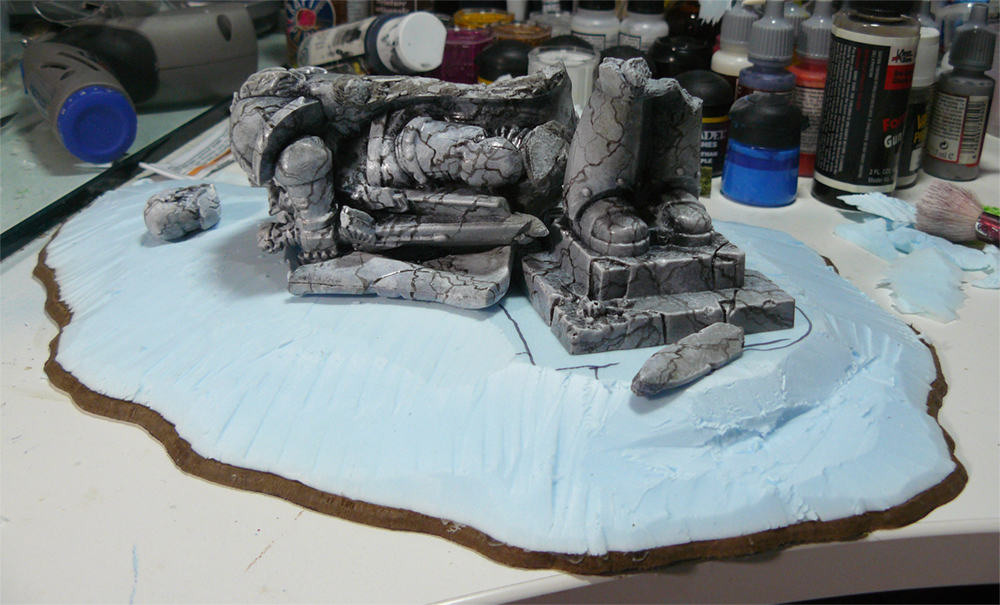
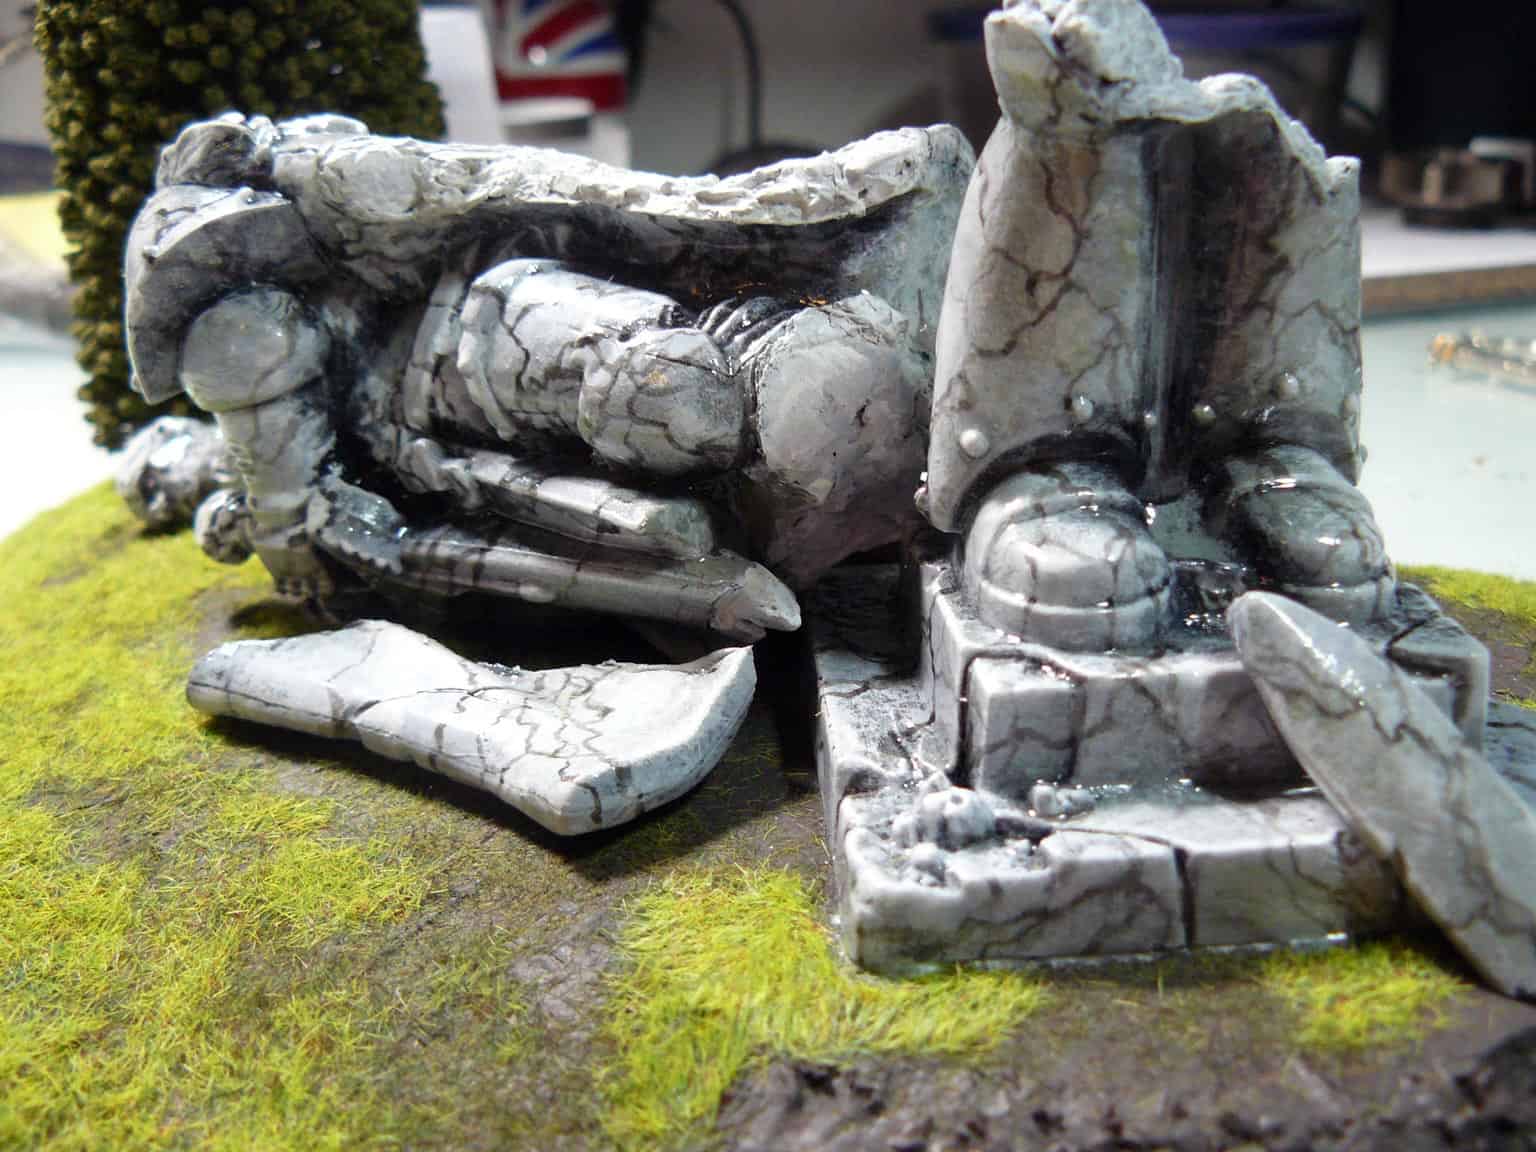
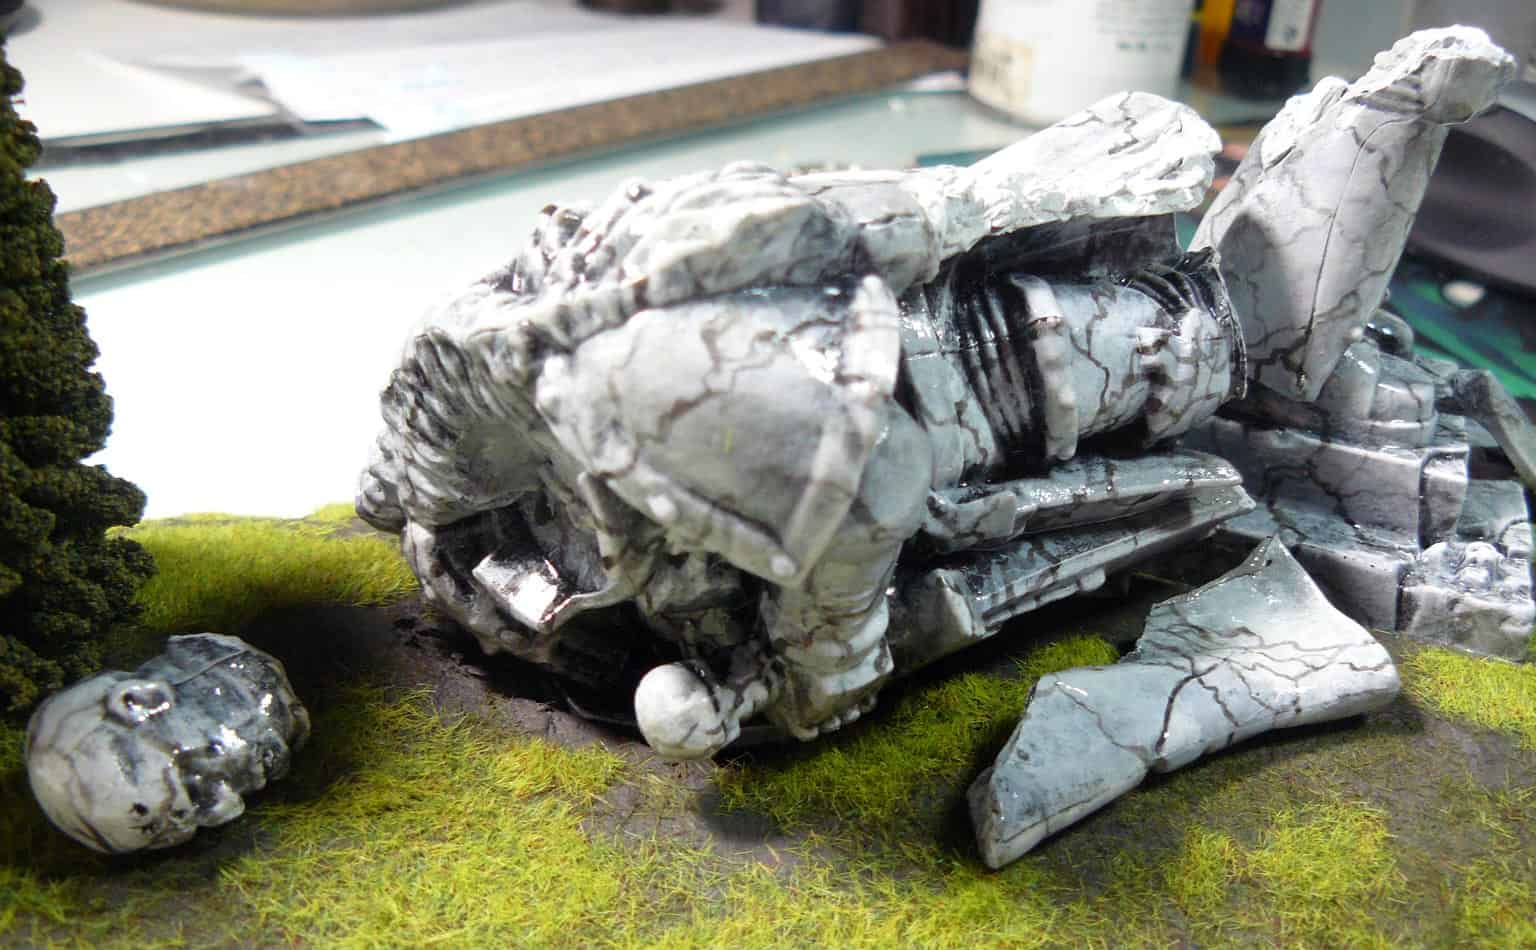
After patching up the holes a very rough coating of light gray and dry brush of white to make the broken parts pop. I used the slate where ever there were gaps between the little rocks I glued in I pressed in grey stuff, like green stuff but I find it to rip up better. Use it kind of like a mortar then take a rock with good texture and push it into it to sculpt it. Once this is finished go ahead and do the zillion coats of gloss to the unbroken areas. Keep that gritty dry brushed texture to the broken areas it helps the contrast. Here is the marble bits of this terrain piece in position on my hardboard and foam hill. With some close ups of the areas that are broken.
Sadly since this was a commission I did not have the budget or time to go as far as I would have liked with this. Vines, tall, grass, leaves, flowers and rain streaks were next on the agenda. Here are the final pics as it was delivered.
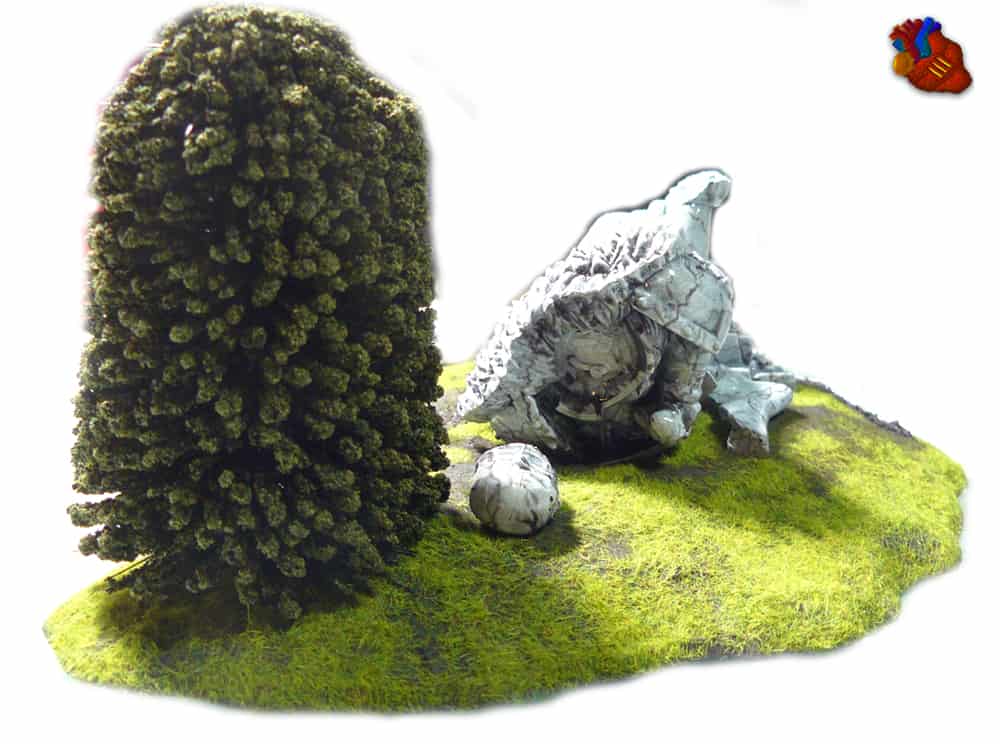
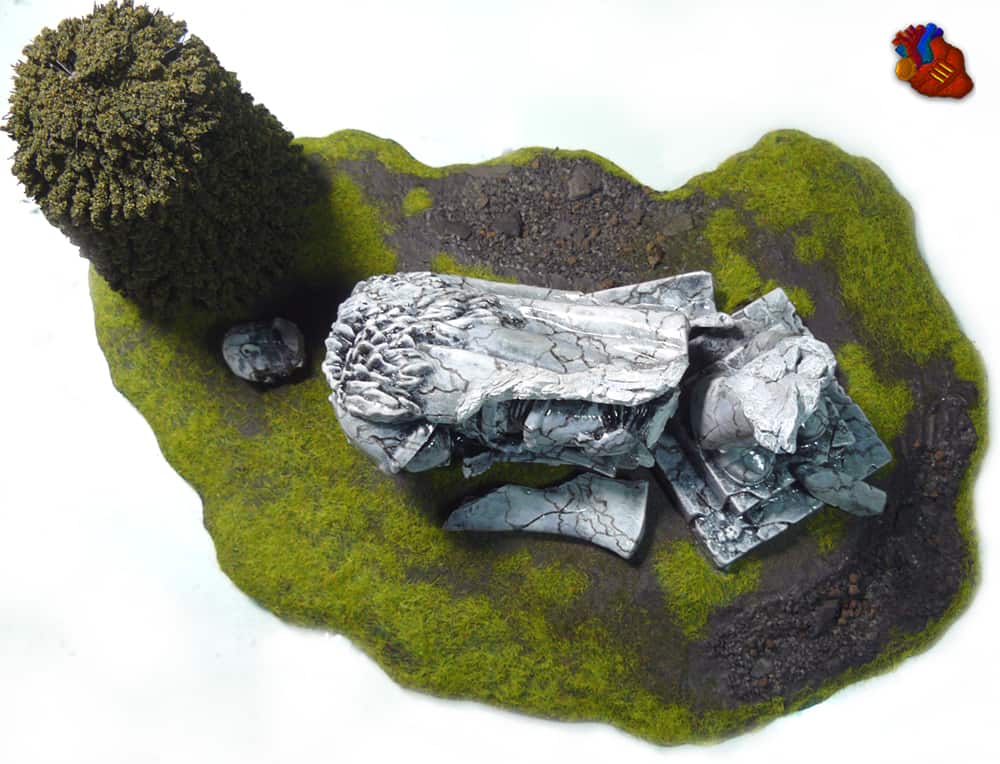
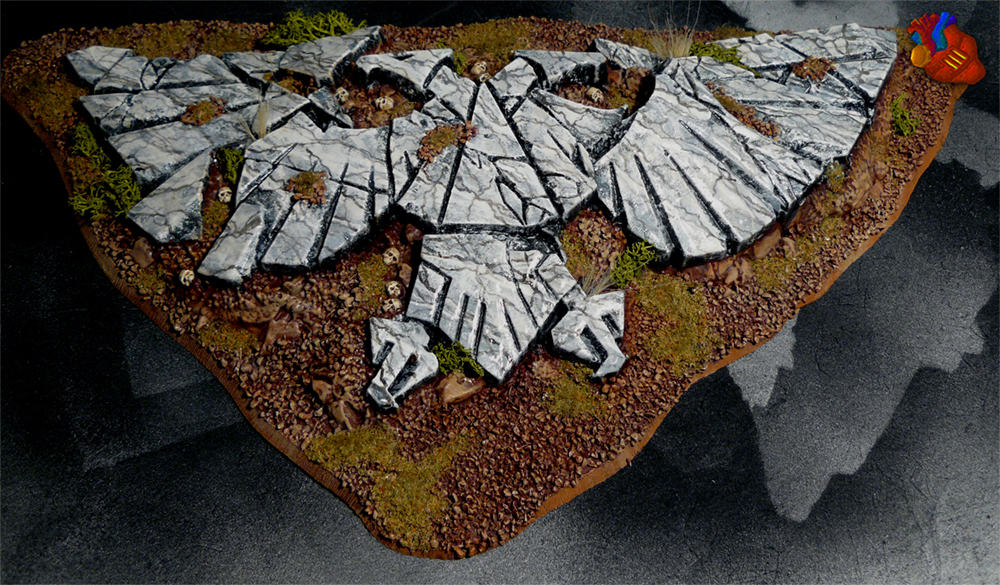
On the other bit of terrain in this kit the process worked very well also.
Thanks for checking out the tutorial if you have any questions use the contact tab on the site.